Friday, June 29, 2012

Pillow Trick

See this sweet little dog?

This is Cole.  Our 3 year old black lab mix.  He can be very naughty.  I think it's totally ironic his name is Cole.  (think Christmas stocking)  We didn't even name him.  This little guy likes to nab our stuff and take it through the doggy door on the porch and out into our backyard.  What's funny is even when I think I've lowered the darn doggy door low enough so that he can get through but not he AND one of our back porch pillows, he manages to do it anyway!  When we got these pillows last year, he chewed a hole in one, tore buttons off a few more, and dragged others into the backyard to try to bury.  Yep.  I caught him in the act one time.  Throw pillows at my house have sadly been off-limits on our main floor.  Sniff, sniff.

Until one day recently Hubby and I had a brilliant idea.  Brilliant because we thought it would look good, and, more importantly, be a way that sweet Cole could not get our pillows.

Here is one of the pillows before:

 We bought several of these last summer on clearance at Target for $5 each.  Our back porch has a  2 chairs and a matching loveseat that we got at World Market last summer.  (I will be posting soon on this favorite room/porch of ours!)  We like the patriotic theme--but not a in-your-face flags everywhere way.  So I did three things with these pillows so that they would be Cole-proof and hopefully look good:

1.  I took off all of the buttons.  They were extra tempting for Cole.
2.  I glued a piece of red ribbon across the center of the pillow to give it more color and to go with our theme we have going on the porch.
3.  I tacked the ribbon to the sides at the seams and left extra length on each side so that we could TIE it to the back of the chairs.  YES, did you hear that Cole?  They are tied.  Ha.

So here is what our pillows look like now:

And the back:


We did something slightly different with the pillows on the loveseat.  Cross your fingers our little fella leaves them alone.   I can't wait to show you the whole porch in a future post!

Linking this project up to the following parties:

The Shabby Nest-Frugal Fridays
French Country Cottage- Feathered Nest Fridays
Chic on a Shoe String Budget-Flaunt it Friday
Simply Sweet Home- Friday Favorites
Featuring Your Sassy Sites
Nap Time Crafters- Friday Favs Party
Pin It!

Wednesday, June 27, 2012

Bookcase Dilemma

A couple of years ago, my very handy hubby built us some amazing bookcases in our great room.  I love them.  I do.  We always get tons of compliments on them.  Originally we filled this huge wall in our great room with 2 buffets that flanked a TV armoire.  I liked that, too, but thought having bookcases along the whole wall would fill the wall and give us lots of storage for magazines, books, and toys.  My hubby doesn't plan much on paper.  It's all in his head.  So, when he was building these beasts in our garage I didn't quite know what his vision was.  I thought we were going to have some bookcases that maybe went half-way up the wall to put the flat screen on and some pretty accessories across the top, have some baskets for storage on the other shelves, you get the drift.  Then I saw the magnitude of the shelves he was building.  They were going to take up the whole wall.  Floor to ceiling.  My first thought was, what am I going to put on all of those shelves??  Luckily we did a little shopping, I pulled things in my house from here and there, and was able to somewhat fill the shelves.  So now, for quite a while, the shelves have looked like this:
  

These brown fabric containers on the bottom hold lots of magazines and some books.  Magically 3 of them fit across perfectly.  The lighter baskets under the TV hold some of our DVDs and CDs.  Here lies the dilemma.  The paint color behind the bookcases.  For a while I was very into the red accent wall (anyone else?).  When hubby put the bookcases up, I didn't even think about, "what if someday I want to change the color behind the bookcases?"  The bookcases are not attached to the wall.  They are wedged in.  Tight.  Another wacky thing about them is that under the bookcases there is old carpet.  Yep.  When we changed our laminate wood floors we decided to not try to move the bookcases and just take the new floor up to them.  I know, lazy decision that we are now paying for.  In order for me to get a different color behind the bookcases, we need to move them.  Just painting the backs of each section is not an option since the bookcases are not attached.  I desperately want a lighter color behind there due to the cave-like appearance of our great room.  Most times of the day it is very dark and you need lights on even on a sunny day.  We also have some large, dark furniture in there and that is also making it seem dark.  (You may wonder why I have no throw pillows on the furniture or anything wonderful on the coffee table?  Trust me.  Would love to. However our sweet dog would have anything I put out in our backyard as a chew toy.  It totally stinks.)  The hubby and I have talked about this numerous times.  He is willing to take the bookcases down, but probably will not put them back up.  We could paint the big wall a creamy color and change the floors so that they are all consistent (we don't like the laminate we put down anyway, so this is a good thing).  However, I don't know if I want to lose these bookcases.  They really are pretty.  They do hold my 500 magazines.  What's a girl to do?  Please weigh in on the matter.  

(I apologize for the centering of my text...it thought my typing was one big caption under the picture and I couldn't figure out how to fix it)


Linking this project to:  Home Stories AtoZ Tutes and Tips 
                My Romantic Home
                                      Classy Clutter:  Spotlight Saturday
Pin It!

Monday, June 25, 2012

Pantry Transformation (Lots of Pictures!)

When we moved in our home 5 years ago, the previous owners had turned the laundry area (which was basically in the kitchen) into a walk-in pantry with white wire shelving covering all of the walls.  We used this pantry for the first few years and loved all of the storage and food/kitchen stuff/misc. junk it held.  It almost held too much.  Being the visual person that I am, looking at all of the stuff would sometimes get my heart rate going...I do not like seeing a bunch of stuff.  I like containers and baskets to make things look organized and uncluttered.  We had considered (ok, I had considered) turning this pantry back into the original laundry space that it was, because the hook-ups for a washer and dryer were still there.  I would love to have a first floor laundry like we did in our old house.  However, this pantry space would not accommodate how we do laundry and I don't think I want dirty socks so close to my food.  With that idea out, I was complaining to the hubby that I had no place to put paperwork, bills, and all of the other household stuff that accumulates.  We used the small pantry in our kitchen for the binders that I used to use to keep all of our bill stubs, receipts, and paperwork.  The kids' coloring books, crayons, and art supplies were also stored in this small pantry.  While I kept it organized and it worked fine, I still wanted something more that felt like an office space.  Did I mention we don't have an office in our house?  We don't.  We could carve out a space in our small-ish finished basement for one, but I am not a basement fan and bills and paperwork are depressing enough without telling me I need to do them in our basement.  Soooo...I convinced hubby to make our large pantry into more of a place where I could store the paperwork, school and office supplies, and art stuff for the kids.  Are ya following me still?   Good.

This is what our large pantry functioned as before.  Tons of shelves, lots of storage, but too visible for me.  You can see that not only food was stored in here, but also dog food, cookbooks,  batteries, and baggies and foils.  Everything.

Pantry--before--EEK!!!
Considering finding a home for all of this stuff seemed overwhelming.   In fact when hubby started tearing out the shelves we realized that the previous owners that installed them did it incorrectly and when the shelves finally came out, we were left with TONS of BIG holes in the drywall.  We wanted to cry and turn back and change our minds about this idea, but it was too late.  After much patching and  trying to fix the drywall, we decided to buy a couple of sets of cabinets that matched what we already had in our kitchen.   I wasn't sure how I was still going to fill them up, or where all of the stuff that was now misplaced was going to go.  I remember thinking when everything was out of the pantry and all over our tables and counters, "What have we done?"  Slowly, each cupboard and drawer got re-worked.  First, the basic junk drawer got tranformed to store just the everyday basics:

Junk Drawer


In the small pantry that once housed our bill binders, art supplies, and telephone books, we put the foods that the kids need easy access to like snacks, bread, and buns.  (cereal is in another accessible cupboard now)  At the top I put our largest plastic containers, pots and pans, and the toaster.    An extra knife set also fit up there nicely.

Small pantry--after

Top drawer of wire cart--drink mixes, pudding, etc.

Bottom drawer of wire cart that is deep for breads and buns

(All of our other food got a new home in some of our existing upper cupboards.  These are foods the kids don't need to get to and it worked out fine to put them there.)
Top 2 shelves of small pantry

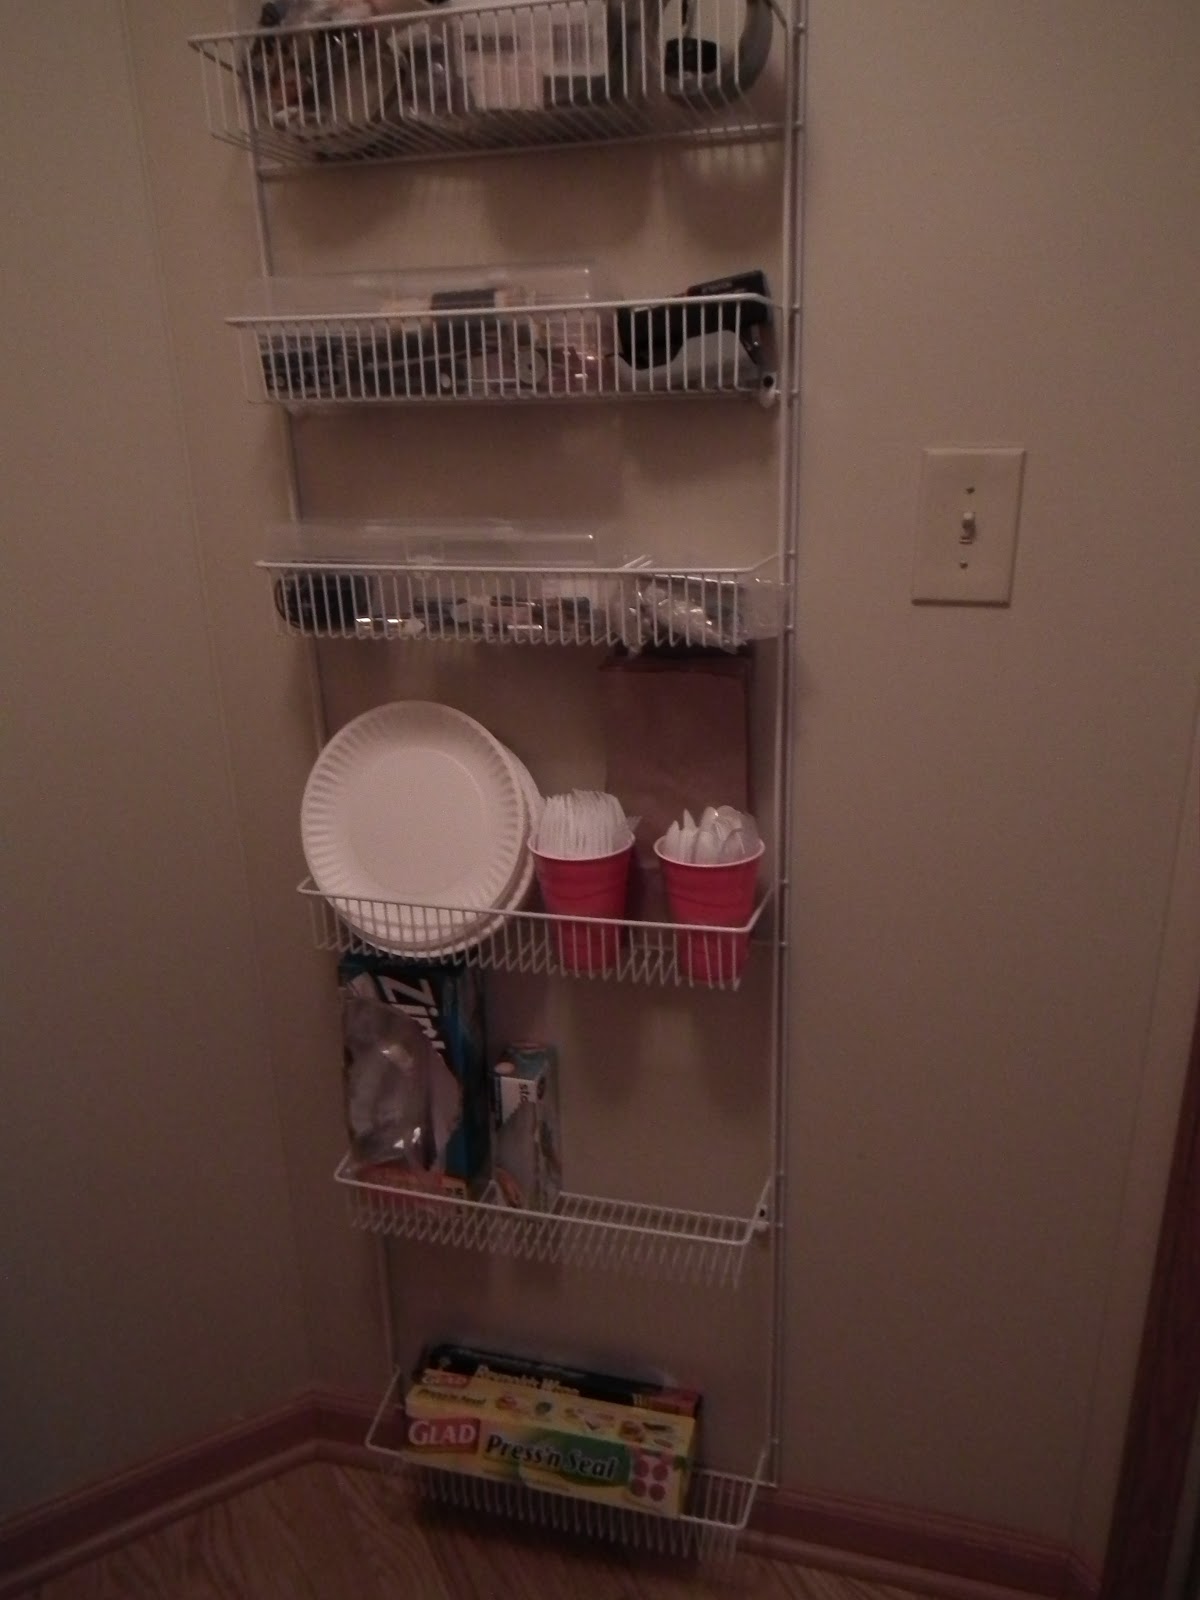
Now, what did we do with the big pantry???  Remember the 'before' from the first picture?  All of the wire shelves?   Here is our big pantry now with cabinets that match our kitchen.  I really love how things are concealed.  On the right we did keep one vertical section of wire shelving for things like baggies, wraps, light bulbs, and batteries.  Ironically and fortunately, the lower cabinet unit was a few inches more narrow than the wall.  Therefore, we were left with a couple inches of space on each side under the extended countertop.  This has been the perfect place for grocery sacks that fold flat, large paper pads, etc.

Big Pantry--after  :)
Can you believe this is the same pantry?  Here are wire shelves we kept on the right:


Here is how I organized the contents of the new cupboards.  It is a mix of art supplies, extra school/office supplies, bill organizers, and even dog food.  But it all works!  Here are what the drawers are used for:


Below, in the bottom cupboards are bills and dog food/supplies.  :)

Bill Storage--better than a filing cabinet because I can take the whole thing out when needed!
The upper cupboards hold awkward-sized appliances, lunch bags, party/paper products, cookbooks, candles (in basket), and some technology-related stuff.


Ta Da!  There's my pantry transformation. I still have some bugs to work out, but overall I like the clean look and a place for everything.  Have you transformed a pantry in your house or reorganized your cabinets?

This project linked up to:
Savvy Southern Style--Wow Us Wednesdays 


Pin It!

Saturday, June 23, 2012

Kitchen Faucet Love

Who knew that a kitchen faucet could seem like a piece of art sitting in the room?  We replaced our typical faucet with a new and improved model.  We got it at The Home Depot.  I love it!  Eventually we will change the hardware on our cabinets to match.  It's amazing how such a small change can make the kitchen feel new.  Other than the backsplash, it's really the only change we have made in our kitchen in the 5 years we have lived in our home.


There she is.  Even got the matching water and soap dispensers.  Like that backsplash?  Hubby did that a while back.  Tiles were 8 cents each.  Gotta love that!  I also adore my bird candle holders.  Meijer--half-off at the end of summer last year.  Anyway, back to the sink...it's makin' doin' the dishes a little more fun.  And you gotta love that.  Happy Weekend!
Pin It!

Thursday, June 21, 2012

DIY Burlap Wreath

In my last post, I created a summer mantel, that I liked, but well, didn't get to hang around for too long.  However, we do have plans for all of the summer-y items and the burlap wreath that I created in another spot that we are working on.  I think the wreath turned out pretty fun considering I had no idea how to even attempt getting wide, awkward burlap to look good.   I started with a simple wicker wreath from the Dollar Store.  I tucked one loose end into the wicker and started wrapping the burlap around tightly, overlapping as I went.


This took about half of the 30 ft burlap roll that I had.  Then I started the next piece by using a glue gun to glue one loose end to the wreath from the underside.


Each time I loosely wrapped it, I put a generous amount of glue to hold the loop where I wanted it and pressed down.  Ouch!  Burlap has holes in it, so then did my fingers...


When I got around the wreath and the "loops"  were fairly even going around,  I glued the end piece on the back.  When this was done, it looked like this:


Fairly happy with the results, I added the finishing touch of the burlap rosettes I found at Michael's:


There you have it.  My DIY burlap wreath.  I might try more in the future and try mixing burlap with another material, but am happy with this first try.   Have you used burlap in any projects before?

This project is linked up to Debbiedoo's linky party!
Pin It!

Wednesday, June 20, 2012

Summer Mantel: Maybe Not?

Yesterday I went to a couple area dollar stores, Jo Ann's, and Michael's to try to get some goodies for a summery-beachy mantel.  Keep in mind we don't live near water.  We live in Central Ohio.  There is a pond in our development, but that doesn't count.  This did not stop me from scouring these stores for summer-y, beach-y items that could all get along well enough to resemble a summer scape of sorts to beautify my mantel.   At the Dollar Store I saw a very simple, pathetic-looking wicker wreath for a buck that said, "you can do something with me".  I have seen many burlap-covered wreaths lately on blogs and Pinterest, so I knew I wanted to cover this wreath with burlap.  I wasn't sure exactly how to do that and still make it look decent...but I was willing to try.  The most expensive items of my finds today were actually the roll of burlap (I found for about $8.00 at Jo Ann's), and the little burlap rosettes (about $4 at Michael's).
Remember what our mantel looked like before that I showed you on my previous post:


Those items came down to make room for summer and after a little bit of re-arranging, this is what I came up with:


I tilted my head a few times, and wondered what I thought...at first I liked everything but the wreath-it blends in with the brick color too much.  Waaaaah.  I really wanted it to work!  When my hubby came home and I excitedly asked him his opinion, he gave his "yuck" look and said, "I can't stand shells!  You can't even see the wreath!"  I pouted again.  However, I do value this man's opinion.  A lot.  We have done many a decorating project together and usually he knows what he is talking about.  He reminded me that if we lived by the coast or water or the rest of our house was decorated in a nautical or beachy theme, then it would be perfect.  But we don't and it isn't.  As I tried to get over my pouting, I realized he was right and I reluctantly took it all down and wondered what I was now going to do with shells and a starfish and other beachy stuff.  Then, my very smart hubby had an idea of what to do with it..... and we started working on that little project tonight.  I even used my first power tool.  He forced me to and said, "You need to learn how to do this."  Did I mention I love this man?  Smart and bossy when he needs to be?  You'll have to stay tuned to see what we end up doing with my wreath and the beachy items, fingers crossed it looks as good as I am hoping.  I also am planning on doing a post soon on how I made my burlap wreath...not that it is prize worthy or too technical, but I think it turned out sort of cute.  Go ahead, give me your opinion...I promise I won't pout too much.
Pin It!

Saturday, June 16, 2012

Summer Must-Haves

We just got back from Disney and it was wonderful!  Sure, the weather was bleeping-hot, but what do you expect in Florida in June?  The kids were great in the car  (remember I bragged about them here... they didn't let us down!)  We ended up driving straight through both there and back...a 16+ hour trip one way!!!  We are troopers, our family.  :)

Now, I feel like summer has officially began.  Since we left for vacation 2 days after we got out of school, it hadn't hit me yet that school was out.  Today is the first day I am feelin' the summer love.  Ahhhhh.

I am dying to  know what your favorite summer snacks/salads/must-haves are.....do you make a special salad only in the summer when fruits and veggies are at their peak?  Do you have a great (easy) dessert to share with us?  Do tell!  Tonight my Hubby and I only had our littlest one home with us for supper.  I went grocery shopping yesterday so we had a ton of food, but neither of us really wanted to make anything big for just the 3 of us, so we got creative with what we already had.  Last night we had grilled chicken and had a couple pieces left over.  We chopped it up, threw it in a skillet to warm it, and put it over lettuce.  Hubby only put cheese and dressing on his (bor-ing!) but I felt like being a little more inventive and healthy.  Here is my creation with a little strawberry-poppyseed dressing, berries (okay, a lot of berries), and chicken.  Mmmmmm.


A big staple in my house in the summer is watermelon.  We. Love. It.  There are usually only a few days in the summer when there is not watermelon in my fridge.  Hubby, and my step-daughter, Kaitlyn, put salt on it.  Does anyone else do that?   I have tried it, and it isn't bad, but I prefer my watermelon straight-up, no sodium added, thank you.


No, I don't usually eat watermelon with daisies alongside, but these are the only pretty flowers really in our yard right now due to so many days without rain here in Ohio!

So share with me your favorite summer must-haves to eat......I can't wait to hear what you can't get enough of this time of year!


Pin It!

Thursday, June 7, 2012

And Summer Break Begins!!!!

As a teacher and mom, I am super-excited that school is out!  I cannot wait to spend time with my kids, relax a little,  and tackle and try those many home projects and ideas that I was waiting until school was out to start.  I know I am very lucky to have some of the summer off.  Believe it or not, like many teachers, I will still be working in my classroom and from home getting ready for the next school year.  However, I plan to take full advantage of staying in my jammies as long as I want, drinking endless cups of coffee, and posting as much as I can!

Pinterest
We will be going on our special Disney trip very soon, so I won't be posting for a few days, but I hope that you'll stay tuned to read my next posts in the coming weeks.    Happy Summer!!!  Woo Hoo!!!


Pin It!

Saturday, June 2, 2012

Traveling with Kids and Keeping Your Sanity :)

As you may have read in a recent post, we leave for our big trip to Disney World soon.  We are traveling from Ohio to Disney with our four kiddos, ages 6, 11, 15, and 21.  They usually do really well in the car. Oh sure, sometimes it seems like we are re-enacting a scene from Vacation (what parent hasn't threatened to pull the car over?), but overall they are quite content and treat each other with at least some sense of civility.  However, it is important that I ensure my sanity as the trip organizer, planner, and entertainment director.  WHEW.

Poor quality picture from movie :)  It was 1983-can you believe that? -Pinterest
On a sidenote, my 6-old year saw the above picture and I told her when she asked that the car was called a station wagon.  She said, "Ohhhh, that's one of the cool cars."  :)

We are blessed enough to have more technology than we could ever need.  I Pods, cell phones, DS's, PSP's, and the rear entertainment system for movies. What more could we possibly need?  The problem is that when driving 17 hours the Tangled movie and same songs on I Pods can get old.  Tell me how on Earth most of us that are old enough survived growing up with no phones, I Pods or DVD systems in the car on long trips?   I rode in our string of station wagons we owned growing up with no air conditioning (except for the last one we had!) and certainly no DVD player.  I remember propping my ghetto blaster up on the side in the back seat and listening to WHAM! and Gloria Estefan.  My sisters and I would write in our diaries, look at Teen Beat magazines, drinking the usually forbidden can of soda and eating Little Debbies.  Ah!  Those were the days.

Any-whooo, back to our Disney trip.  I am on the search for the best ideas for traveling on long trips with kids.  I searched my fave Pinterest, and some other sites.  Very savvy, practical moms have already thought of everything for me!  I want to showcase a few of the best ideas I saw when doing some research.  I hope at least one idea inspires or helps you for any summer journey you may be taking!

One great site where I found a mega-list of travel tips for kids is We are THAT Family.  Here are some of my favorite tips I found here.

1.  Tape record (buy used at a garage sale or use an old tape recorder you have lying around)  your own voice reading stories that your kids can listen to.

2.  Take a dry erase board and marker.  This encourages drawing, writing, and endless games of tic-tac-toe.  One way you can also use dry erase markers is to use a plastic sleeve (like from an office supply store) and put any tracing paper inside.  You could draw a large tic-tac-toe board on a piece of paper, stick it inside the plastic sleeve, and write directly on the plastic.  When done, it just wipes right off.  You can use an old sock or a piece of felt as an eraser.  To have a flat surface, you can clip the paper/sleeve to a clipboard.

3.  Play Printable Car Bingo. (click for the link to this PDF printable) I love this idea!  Older kids can help the younger kids and it's fun for everyone as it passes the time.

Some of my own ideas that I always do on road trips:

4.  Take a roll of paper towels and a container of baby wipes for spills and messy hands.

5.  Take a few plastic grocery bags and use them for trash.   Each time you stop for gas or potty breaks, toss the bag.  I am a freak about having trash lie around in the car!

6.  Take paper and pens.  Everyone likes to draw or doodle to have something to do.

7.  Have each child take a special bag with all of their goodies in it--books, headphones, stuffed animals, games or music, etc.  Since I have a wide range of ages, this is necessary because they don't really use the same things.

8.  Pack an outfit for each member of the family in a small bag if stopping overnight on the way to your final destination.  This saves you from dragging all of your big suitcases into a hotel when you are tired and grumpy.

9.  Take a couple of garbage bags for dirty clothes or wet suits and towels that didn't have time to dry before you left.  Your nose will thank you later.

10.  And last, but not least...loosen up!  Vacations or road trips are a huge part of childhood.  Say 'yes' to the snacks or drinks you wouldn't normally approve (within reason, of course), be patient with each other, and remember that you, as the parent, have a huge impact on the whole trip.  If your attitude stinks or is less than positive, it effects everyone.  Make as many memories as you can and take lots of pictures.  They are only this age once!  Someday you will be wishing they were still in the back seat screaming at each other.

If YOU have some great travel tips or ideas, please share!!!  I look forward to hearing your ideas!


Pin It!
Related Posts Plugin for WordPress, Blogger...