Sunday, September 30, 2012

Fall Porch 2012

I have been trying to prepare for my 31 series that starts tomorrow, but my hubby and I have been busy today decorating our front porch for fall.  He also moved the 2,000 brick pavers that have been sitting by our driveway for two weeks to the backyard in hopes of someday creating a large brick patio in the fenced-in part of our backyard.   I'll let you know when that happens.   That's gonna be a big job.

Until then, I thought I'd share some pics of our porch.


Sorry for the weird angle of the this last picture--our front yard angles down so you can't take a picture of it well.   And, yes, the large pumpkins are fake, but I'm okay with that.  I bought fake ones for the same price as reall ones and I will be able to have them year after year!

Don't forget, tomorrow starts my 31 day series!

Sharing with:
I Heart Naptime-Sundae Scoop Party
It's Overflowing-Overflowing with Creativity
Flamingo Toes-Think Pink Sunday
The Inspired Room
Pin It!

31 Days: Preparing for October's Series

Have you heard of the 31 Days series over at the amazing Nester?  Last year, before my blogging began, I read posts from many, many other great bloggers that joined and had their own 31 days series.  This year, I have decided to join in the fun (and maybe in the pressure...31 days straight of blogging?  Yikes.)  and challenge myself to blog on the same topic for 31 days.  It feels a little crazy and intimidating, because other than brushing my teeth, I am thinking that I have not done something for 31 days straight unless it was like blinking or sleeping.....


In the month of October, for 31 days straight, I plan on making my posts geared toward finding ways  to make my life (and hopefully yours too!)  less stressful and more joyful.  I am a full-time teacher by day, mama and domestic goddess by night and (ha!)  I totally need some ideas and plans for a less stressful nest!

I plan on posting some great ideas on organization, little projects that pack a punch, creating routines and habits that help things run more smoothly, and tips for preparing for the holidays.

 I would love for you to join me the whole month of October so that together we can beautify and organize our homes and make them a little less stressful.

See ya tomorrow for Day 1 of the series!


Pin It!

Sunday, September 23, 2012

Fall Mantel-2012

Yesterday I posted about our fall tablescapes. {CLICK HERE IF YOU MISSED IT}  Today I am going to share my fall mantel and a buffet we have in our great room.  I went more simple this year, no leafy garlands like I would normally do.  I like the result.  See what you think:


I love how the floral stems I got at JoAnn's droop to the side. I kept the painting my hubby's aunt did, the green vases,  and the little metal pail with green ball in it from before.  The pinto beans in the base of the candle holder, pumpkins, and flowers are all that I purchased.


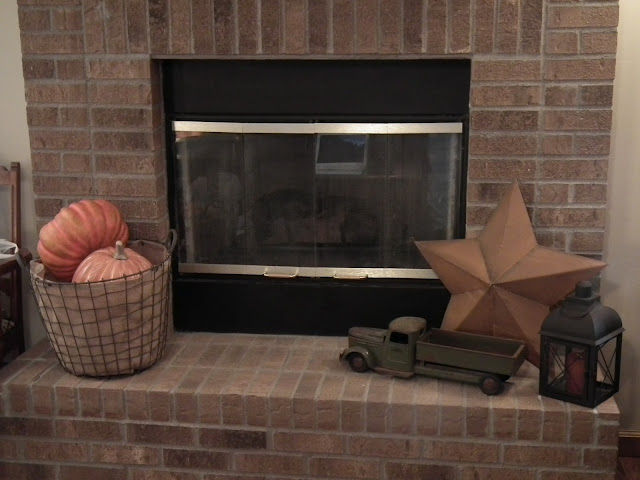
I bought this awesome metal basket with burlap liner at Marshall's for $12.99.  The lantern and star were already there.  The old metal truck (which I love) was actually my hubby's father's when he was a boy.  How cool is that?


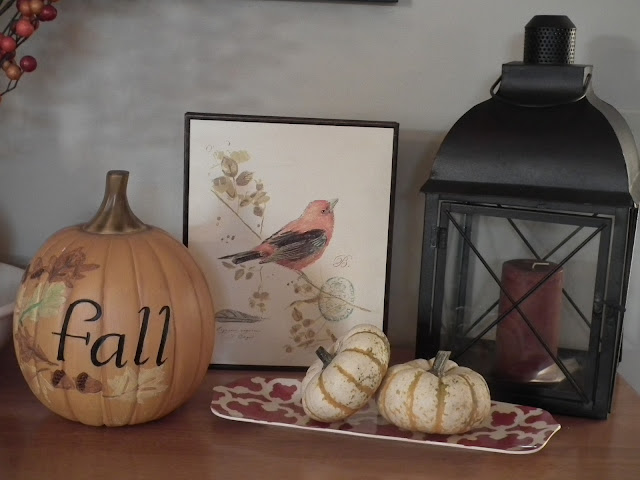
Here is the buffet we have in our great room that stores card games and my daughter's books.  We have a matching one in our master bathroom.  I posted about bathroom storage in that one {HERE}.    I had everything on this buffet before, all that is new are the pumpkins!


Thanks for taking a look at my fall decorating!  It is definitely getting me in the mood for fall.  What are you doing to get in the mood?

Linking up to:
It's Overflowing
Not Just a Housewife
The Inspired Room


Fall Party
Pin It!

Saturday, September 22, 2012

Fall Tablescapes

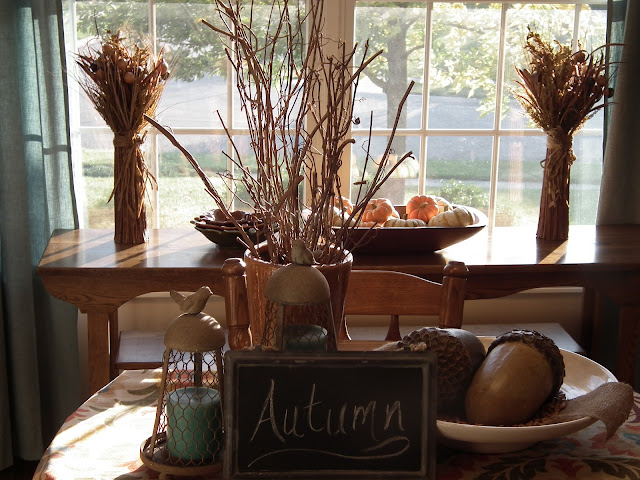
I have been slowly getting ready for fall around here.  I decided that I didn't want to go overboard, like I sometimes have in the past, and I didn't want to buy many new things since I really didn't need anything.  In my fall decorating this year, I spent 6 bucks on some stems of artificial flowers for the mantel, 9 bucks on real, small orange and small-ish tiger pumpkins, and 3 bucks on pinto beans that I used two different places.  I will let the pictures show you how I spruced up our small dining table in the dining room and the sofa table in there that is in front of our window.


Here is what I already had:

-Large acorns--Hobby Lobby a while back, strip of burlap in bowl leftover from my DIY burlap wreath, you can see that post {HERE}
-Large wooden bowl/trough on sofa table--Pottery Barn Outlet
-2 straw floral arrangements on sofa table-Jo Ann's a few years ago
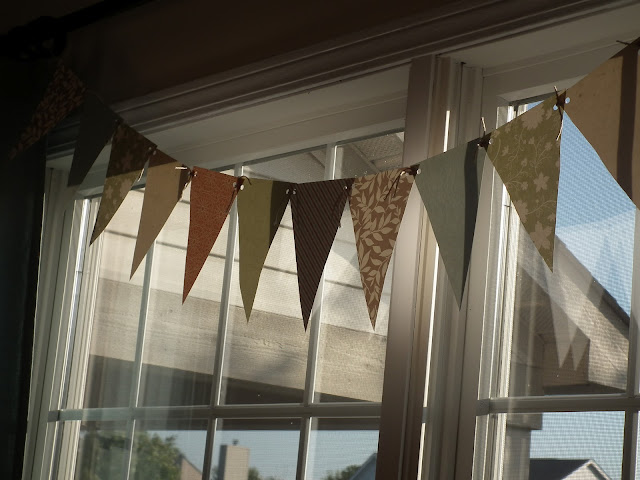
-Paper banner-made with leftover scrapbooking paper I had--I made one for my daughter's beach-themed birthday party this summer, you can see that post {HERE}
-Bird candle holders-Meijer a few years ago, these are normally behind my kitchen sink
-Fabric on table-leftover from my Fall-ish Pillows-you can see that post {HERE}

Tomorrow I will be posting about some fall changes in our great room, including on our mantel.  I hope you will stop back and take a peek!

Linking up to:

The Lettered Cottage


One Creative Mommy
Western Warmth: Weekend Warmth
It's Overflowing
Not Just a Housewife


Fall Party
Pin It!

Sunday, September 16, 2012

Using Old Books: {Meaningful Pieces}

When at my parent's house today I spied some books that I've had my eye on.  The books belonged to my sweet mom, who passed away last June.  She was an avid reader and had books for as long as I can remember.  Paperback novels, mysteries, old classics, you name it, she had it.


We have this giant set of bookcases in our great room (see past post about those HERE).  While I do love them and they nicely fill out our huge wall, they lacked, well, books.  I have accessories and pictures and other things to fill the shelves, but really no books.  Kinda embarrassing.  You see most of the books I have are paperback or not bookcase-worthy.  I have a few nicer, large "coffee table" type books, but not many.  So when I was looking through a bookcase at my parents' house today, I asked my Dad if he cared if I filled up a couple bags of books.  Of course he said "yes" so I went about sorting the types, sizes and colors I wanted to use in my bookcases and filled 2 paper bags. When I got home,  I set about finding spots for them in my bookcases:


I am loving the yellow horse head above, by the way.  It's this weird quirky thing that is sort of out of my comfort zone, but fun.  I found him on clearance at Marshall's.  I knew the hubby would give me his "look" when he saw him for the first time, but he's grown to love him.  At least that's what I'm sayin'.

I still have some work to do on the bookcases, still have shelves to fill and re-arranging to do.   I also am working on a strategic way to hide all of the electronic cords before I reveal the whole thing to you all. Soon I will be putting some hints of autumn in there...can't wait.   Have a wonderful rest of your weekend!

Linking Up to:
This Gal Cooks-Marvelous Mondays
Western Warmth
At the Picket Fence
Pin It!

Saturday, September 15, 2012

Progress in Great Room=Fall-ish Pillows

We have lots still going on here at our house lately...projects that are 80% done, new projects waiting to be started, all the while I'm back at school and the 3 youngest are all in sports.  That is why it is taking us so long to get the other 20% of the projects done.  My hubby also had 2,000 pavers/bricks delivered yesterday.  Hmmm.  Says he's going to build a (huge) patio out back by our little pond he created.  Not sure when that is going to happen, but will be sure to fill you in along the way...

Meanwhile, I recently purchased some amazing fabric at my local Jo Ann's.  Oh how I love fabric.  Print and patterns make me a happy girl.  Since I am super picky when it comes to fabric, I was thrilled to find a new line made by Waverly that is fresh, colorful, and goes with our more rustic great room.  It's a little 70's if you ask me, but I'm okay with that.  I think it looks like the epitome of a fall palette.  Here are my purchases still on the bolts:


I love all three prints, but particularly the blue and the colorful chevron-looking one.   I am a novice sewer, but managed to use pillow forms to create a pile this pile of happiness:


I am loving these prints together!  They go wonderfully with our dark brown furniture and new floors and they are perfect colors for fall!


The only problem with having all of these pillows is our furry friend, Cole, will think he has the right to  sneak one off and out the doggy door for his personal chew toy.  I'm still working on how to prevent that.  Remember my {Pillow Trick} post this summer?   That has worked like a charm, but I tied those pillows with ribbon and there is no way to do that to these new pillows.

I have lots more to show you in our great room this month that we have been working on including our finished floors and trim, the bookcases back up, and some fall decorating.  Have a great weekend!

Linking Up To:
Western Warmth
At the Picket Fence
Pin It!

Sunday, September 9, 2012

I {Heart} Green

Hope you had a great weekend!  We have lots of projects going on around here, and I can't wait to post about them all soon.  Nothing is done enough to share, but our whole first floor has changed and I have been making some cute burlap pumpkins for Fall that I am so excited to share soon!

I was noticing the other day how many of the rooms in my house (except the kids' rooms) have green in them.  Lime green, forest green, apple green, lots of green!  It is such a pretty color and I'm not sure that there is a hue I don't love!  I took some pics of spots on our first floor (great room, kitchen, eating area) where I spied green.  

These cute storage containers from Target hold my cameras and other little items in our pantry. {Click HERE to see how we completely transformed that area}


Here are my fave curtains from World Market.  LOVE this color palette.  See how I made curtain valances from napkins of this same print {HERE}.


I put up some melamine plates I got at Target in the Spring.  The patterns make me happy. AND of course, I love the colors!


A few years ago I bought these, uh, not sure what they are, but they are GREEN and I like them.  :)  They reside on our bookcases (yes, we put them back up!! There will be a post on that reveal soon.....)


Also in our bookcases is one of my favorite pitchers.  I posted about this beauty in the spring when it housed some gorgeous tulips.  You can read about that post {HERE}.


And lastly, some pics from our mantle.  I posted about the meaningful piece of art that my husband's aunt painted {HERE}.  Notice how there  is so much green up there?  Love it.


Another thing I love about the color green and using it in the home is that is plays well during every season.  It can be pretty in the spring and summer with about any other color and looks amazing in the fall with oranges, brown, and golds, and of course shines at the holidays with it's partner, red, and about any other new favorite holiday color.   So what about you?  Do you love green in your home as much as I do?


Pin It!

Tuesday, September 4, 2012

Paper Bag Flowers

I can't take credit for this cute and easy idea---the great gal in charge over at A Place For Us did a tutorial for a paper flower using a brown paper sack.  I made one of these recently and posted it in my Family Organization Station post.

I got to thinking how easy those were to make and how paper bags come in lots of fun, bright colors and how cute they would be as decoration in my daughter's room, at a birthday party, or other cheery event to hang around and add some prettiness.  Look at what I made using some favor bags from Target:


What's extra fun is that this came from one type of bag.  The sides are the wider striped print and the flap on the top is the more narrow stripe.   These bags come in a pack of 8 for about $3.50.  I used 2 bags to make one flower.


A Place For Us has a great tutorial, but I'll give you the quick run-down of steps.  First, cut off the flap at the top of this bag (obviously most bags like this don't have flaps like mine do, so you may not have this step if you are using regular sacks).   Then cut across the bottom where there is the crease.  Your pieces will then look like this:


These bags have the great stripe along the side.  I saw other colors and patterns of these bags at Target that would also be fun to use.


With the main part of the bag lying flat, trace a large leaf shape.  Cut out.  One end should be flat and the other pointed (dotted print).  You will have two of these pieces.  As you are cutting, the sides will fall out and you will have 2 leaf shapes automatically made for you.  (striped print)


Take each leaf shape and fold in half to make a crease so that the sides slightly bend up.  Using a glue stick, glue together the ends starting with 2 glued together, then the other two glued on top of them.


 Take the smaller leaves,  fold in half, and glue on top of the large leaves.


Since my sacks had flaps (sounds funny), I used them to cut even smaller leaf shapes, folding them in half lengthwise like the others and gluing them on top of the other "petals".

Flaps


Last, with a scrap of the dotted paper, I made a circle to glue in the center.

Isn't it cute?  I love how it turned out.  I made 2 and hung them on my daughter's wall.


I am totally going to be on the lookout for seasonal paper sacks that will be coming out soon to make more flowers.  You also could use scrapbooking paper and make paper leaf shapes and do the same thing.

Sharing this project with:
Southern Savvy Style
Sugar Bee Crafts
Brassy Apple
I Heart Naptime
Pin It!
Related Posts Plugin for WordPress, Blogger...