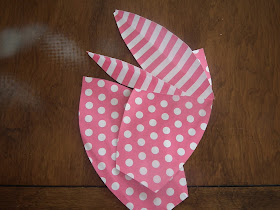
A Place For Us has a great tutorial, but I'll give you the quick run-down of steps. First, cut off the flap at the top of this bag (obviously most bags like this don't have flaps like mine do, so you may not have this step if you are using regular sacks). Then cut across the bottom where there is the crease. Your pieces will then look like this:
These bags have the great stripe along the side. I saw other colors and patterns of these bags at Target that would also be fun to use.
With the main part of the bag lying flat, trace a large leaf shape. Cut out. One end should be flat and the other pointed (dotted print). You will have two of these pieces. As you are cutting, the sides will fall out and you will have 2 leaf shapes automatically made for you. (striped print)
Take each leaf shape and fold in half to make a crease so that the sides slightly bend up. Using a glue stick, glue together the ends starting with 2 glued together, then the other two glued on top of them.
Since my sacks had flaps (sounds funny), I used them to cut even smaller leaf shapes, folding them in half lengthwise like the others and gluing them on top of the other "petals".
 |
| Flaps |
Last, with a scrap of the dotted paper, I made a circle to glue in the center.
Isn't it cute? I love how it turned out. I made 2 and hung them on my daughter's wall.
Sharing this project with:
Southern Savvy Style
Sugar Bee Crafts
Brassy Apple
I Heart Naptime


Those are really really cute- and easy!!! xo Diana
ReplyDeleteHow cute!! I love that you took it to the next level and used cute pattern bags! Love it Nicky!
ReplyDelete